wordpress
A free simple WordPress theme starter template
I am a graphic designer, not a developer/programmer. But I do enjoy creating Themes for WordPress. From the beginning I mostly created HTML templates that I updated manually, that is not enjoyable. Then I took a brief look at WordPress and decided it was too hard to create themes for, so I learned PHP and MySQL and created my own simple CMS instead.
Yea, I know… as if creating a CMS from scratch and then maintaining that and the website would be any easier. After a year or so I was smart enough to take another look at WordPress, and was surprised to find out that what I thought was difficult at first, now seemed logical and straight forward. With that said, this starter template is not designed for “developers”. It’s created for designers that have some basic knowledge of coding that wants their static HTML templates to hold dynamic content, but don’t want to get too technical. Meaning, there are no “fancy” solutions or complicated setup. Just add some HTML, classes, CSS and JavaScript to make it your own.
Converting static html in to a WordPress theme is actually not that hard, the problem I find is to remember the most important php-WordPress-specific functions to use. This starter template is the solution. It has CSS and JavaScript files already enqueued. Editor styles enabled. It has custom menus set up and included in the header and footer. It has some common theme support hooks ready to uncomment and use. I have commented all the important code.
Use the link below to download it.
More about the free simple WordPress theme starter template
This is not a blocks theme starter template, consider it a hybrid theme starter template. Call me old fashion, but I still prefer hybrid themes where everything but the content is either hardcoded or customized via the Customizer. Especially when creating themes for customers that is only interested in the content. They don’t need a highly customizable theme.
The starter template includes the following files and folders:
pivemo-starter-template
- style.css
- functions.php
- index.php
- page.php
- single.php
- archive.php
- header.php
- footer.php
- 404.php
- screenshot.png
- theme.json
- editor-styles.css
- readme.txt
- assets
- css
- normalize.css
- style.css
- js
- main.js
- css
- includes
- custom_post_type.php
- customizer.php
- navbar-header.php
- navbar-footer.php
- images
- sample-logo.svg
- no-image.jpg
What’s in it?
The template has minimal HTML and only a few lines of CSS. The point is for you to add your own CSS and alter the HTML for your purpose. The most necessary WordPress functions are already in place. To get you started on how to add customization via the Customizer API I have added one example. You can choose if you want to use a logo image or text in a theme specific panel. This file also includes an example for adding a color picker to the customizer, just uncomment the code and try to implement. Also be sure to rename the panel so that I reflects your Theme Name.
In some places I have added comments regarding the HTML in to empty PHP tags instead of regular HTML comments. The reason I have done so is that comments in PHP won’t show in the front-end like HTML comments do. These comments can potentially reveal sensitive information about the files and folders.
Prerequisites
This walkthrough assumes you have basic knowledge in setting up a developer environment with a local installation of WordPress ( I recommend Local by Flywheel https://localwp.com/, and VS Code https://code.visualstudio.com/ ), that you know how to install themes in WordPress either by copying it to the themes folder or uploading the zip file. It also assumes that you know how to add and edit HTML and CSS. Even though its preferable that you know some basic PHP you should be good anyway as long as you only alter the HTML surrounding the PHP.
Adding HTML
You will probably want to add HTML to this template. Elements like the page header is a bit “minimal” but if you are a beginner my suggestion is to adjust your CSS to the output of the navigation that WordPress gives you and not try to alter the output.
If you want to use a CSS framework like Bootstrap for your menus you are going to need to implement a custom Walker Class, otherwise the structure and class names will be wrong. However, adding a custom walker is out of the scope for this template and “guide”. If your site uses Bootstrap and you want to add a custom walker, one is found here ( https://github.com/wp-bootstrap/wp-bootstrap-navwalker ) with excellent instructions.
Header
The header.php file starts with the standard HTML opening and all the tags up until the closing header tag.
These are the essential functions in that file.
- language_attributes(); This takes care of setting the language attribute to the same language as your WordPress site.
- wp_head(); This is the function that inserts all the styles you have enqueued in the functions.php file. It will also output other information from any plugin of function that uses the “wp_header” action hook.
- body_class(); Gets some good to have WordPress classes.
- wp_body_open(); used by allot of plugin developers for inserting scripts that needs to go before the content.
- home_url(); Does exactly what you think, is gets the link to your start page.
- esc_url(); This function checks and cleans a url.
- get_theme_mod(); This function gets settings made in the Customizer.
- get_template_directory_uri(); Gets the active theme folder root.
- get_template_part( “incudes/navbar-header” ) inserts the navigation part for the header.
Instead of including a file you could move the code from the file into the header.php file. It is structured like this because you sometimes want to access the menu in other parts of the layout. Also, separating files and its functions are a good way of uncluttering the code.
Footer
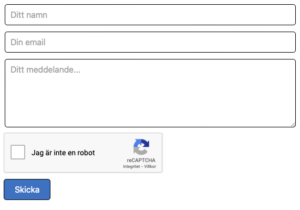
This file is not that different from the header.php, footer.php comes with a simple contact form. The form will post information to a custom post type called “Messages”. A tab is added in the WordPress back-end where the messages are stored. Only a simple honeypot and nonce field protect the form. Even though the honeypot stops most attacks from spam bots it’s far from foolproof. If you want to add more security, which you should, I suggest removing the form and use a third-party plugin, there are lots to choose from.
The footer.php file includes the following WordPress specific functions.
- wp_footer(); This function is responsible for adding enqueued scripts and anything else that uses the “wp_footer” action hook.
- get_template_part( “incudes/navbar-footer” ); inserts the navigation part for the footer.
- __(‘Value’, ‘texdomain’); A translatable function (i18n). Be sure to use the same textdomain in all files you have translatable text in. It also needs to correspond with the text domain you have set in the style.css file.
Page and Single
The page.php and single.php page templates have the exact same markup. The page.php template will show the content coming from the Pages post type. And single.php will show the content from a single post. The content is outputted inside a div with the class “container”, inside a main tag. The page title will go inside a h1 tag.
Functions inside these files:
- get_header(); As the function says, this will get the header file.
- A while loop that will go on as long as it have posts (have_posts()) to show.
- the_post(); Fetches a post object, meaning, all the content connected to the post.
- the_title(); Will output the title, you can provide a before and after. In this case I have provided a h1 tag to the title.
- the_content(); Will output all the content from a post or page, not including the title.
- get_footer(); As the function says, this will get the footer file.
Index
Like the page.php and single.php, index.php is a page template. It’s the last fallback if there are no other page templates. Therefor its necessary for a theme to work. It is also responsible for showing a blog page if you don’t provide a separate template for that purpose. You could create a separate template for that purpose, but that requires you to select that template for your blog page in the WordPress backend. You could of course also do it programmatically. Since I didn’t want to include templates that are not “supported” without tweaking, index.php will handle the blog page.
This template is a little more advanced than page.php and single.php and also includes more HTML markup. Like the page and single templates, it runs the loop and gets “the_post”. After that we break out the content and also accesses the featured image for the post. If the post doesn’t have a featured image, a fallback image will be provided. After that it will output the content in a more structured way inside an article tag. Since it’s considered a thumbnail of the post it will either trim the text or if an excerpt is available, it will show that.
Functions inside index.php:
- get_header(); As the function says, this will get the header.
- A while loop that will go on as long as it have posts (have_posts())
- the_post(); Fetches a post object, meaning, all the content connected to the post
- get_the_date(); Gets the date of the post. Needs to be echo:ed.
- get_the_permalink(); Will get the href value, the link, to a post from the post id.
- get_the_title(); Needs to be echo:ed.
- wp_trim_excerpt(); Will trim the text content if a post doesn’t have an excerpt.
- __(‘Value’, ‘themedomain’); Explained in the footer explanation section.
- get_footer(); As the function says, this will get the footer.
The post thumbnails will be displayed in a flex container with a flex wrap, otherwise there is no styling provided.
404
This is the template with the least amount of complexity. It displays when a user tries to access a nonexistent posts or pages, like you would assume. It will show the user what it was trying to access using the $_SERVER[‘REQUEST_URI’]. That’s about it.
Includes folder and its content
Except for the navbar-footer.php and navbar-header.php the files in this folder requires a little bit more knowledge of WordPress and PHP. They handle custom post type and the Customization API.
For more information about:
- Custom post types see, https://developer.wordpress.org/plugins/post-types/registering-custom-post-types/
- Customization API se, https://codex.wordpress.org/Theme_Customization_API
Functions the_ or get_the_
When outputting content to the frontend there are essentially two different types of functions. Functions like the_ID() will automatically echo the value whereas get_the_ID() will only get the value and you have to echo it out yourself. Why I choose to use the_ID() as an example is that you are more likely to use get_the_ID() then the_ID() since echoing the post id to the front-end is unusual. Using the id to access other values in posts are on the other hand a common practice.
So, in short:
- the_* functions will echo the value.
- get_the_* functions only get the value.
The translatable function
__(‘Value’, ‘themedomain’); i18n function
Whenever you see the above syntax it means that the “Value” is setup to be translatable. The function will return the value if no translation is provided. So essentially, if you provide no translation it will return the value from the first property of the function.
For the function to work properly you need a text domain in the styles.css file that you use consistently throughout your code. Then you need to provide translations to other languages. The easiest way to do that is to use a plugin, I recommend Loco Translate (Visit the plugin page). It’s free and easy to work with. It has all the functionality that I have ever needed.
If you know you will never translate your theme you can remove the function and replace it with a string.
// Examples on how to replace the i18n function

// In HTML
<h2><?php echo __('Batman needs voice coaching', 'themedomain');?></h2>
// Function removed
<h2>Batman needs voice coaching</h2>

// In PHP
array(
  'title' => __('Batman needs voice coaching', 'themedomain'),
);
// Function removed
array(
  'title' => 'Batman needs voice coaching',
);
The purpose of the starter template
The purpose of this starter template is to get graphic designers that know enough HTML and CSS to get going with theme development. So that they can make nice looking all custom pages for their customers.
There are a lot of starter templates out there but most of them are too technical for most beginner theme developers, not everybody that wants to create themes are developers.
Use this for pages that only need content updates and no dynamic design updates. So, set the design and use it for your clients who only wants to add and update content.
What this starter template is not
It’s not aimed at developers that wants to create an all-purpose theme for wide distribution, there are certainly better starter templates out there for that.
Happy coding!
More from the blog
If you are English speaking you won’t find much on the blog since all the other posts are in Swedish, since Im Swedish. If you still want to take a look, the latest post that have anything to do with programming are listed below. Happy reading!